Each of our templates contains a demo version (where you can view the visualization of the site or block), as well as unique IDs of pages or blocks that you can upload to your account.
Create an account and pay for it
To take advantage of the opportunity to upload templates and edit non-standard blocks, you need to create your own account and pay for it: any paid plan for any period will do.
To get an additional 2 weeks to the paid period, activate the Tilda Personal Plan for 2 weeks for free (the "Plans and Billing" menu). To do this, go to the Plans and Billing section and click Activate. This feature will be available until the first payment. If you do not make the payment after two weeks, the site will not disappear, but please note that if you want to publish the site on your domain (not in the free version on the subdomain tilda.ws ), then you will still have to buy a paid plan after two weeks.
After that, you will be able to add a template by ID.
Installing a template
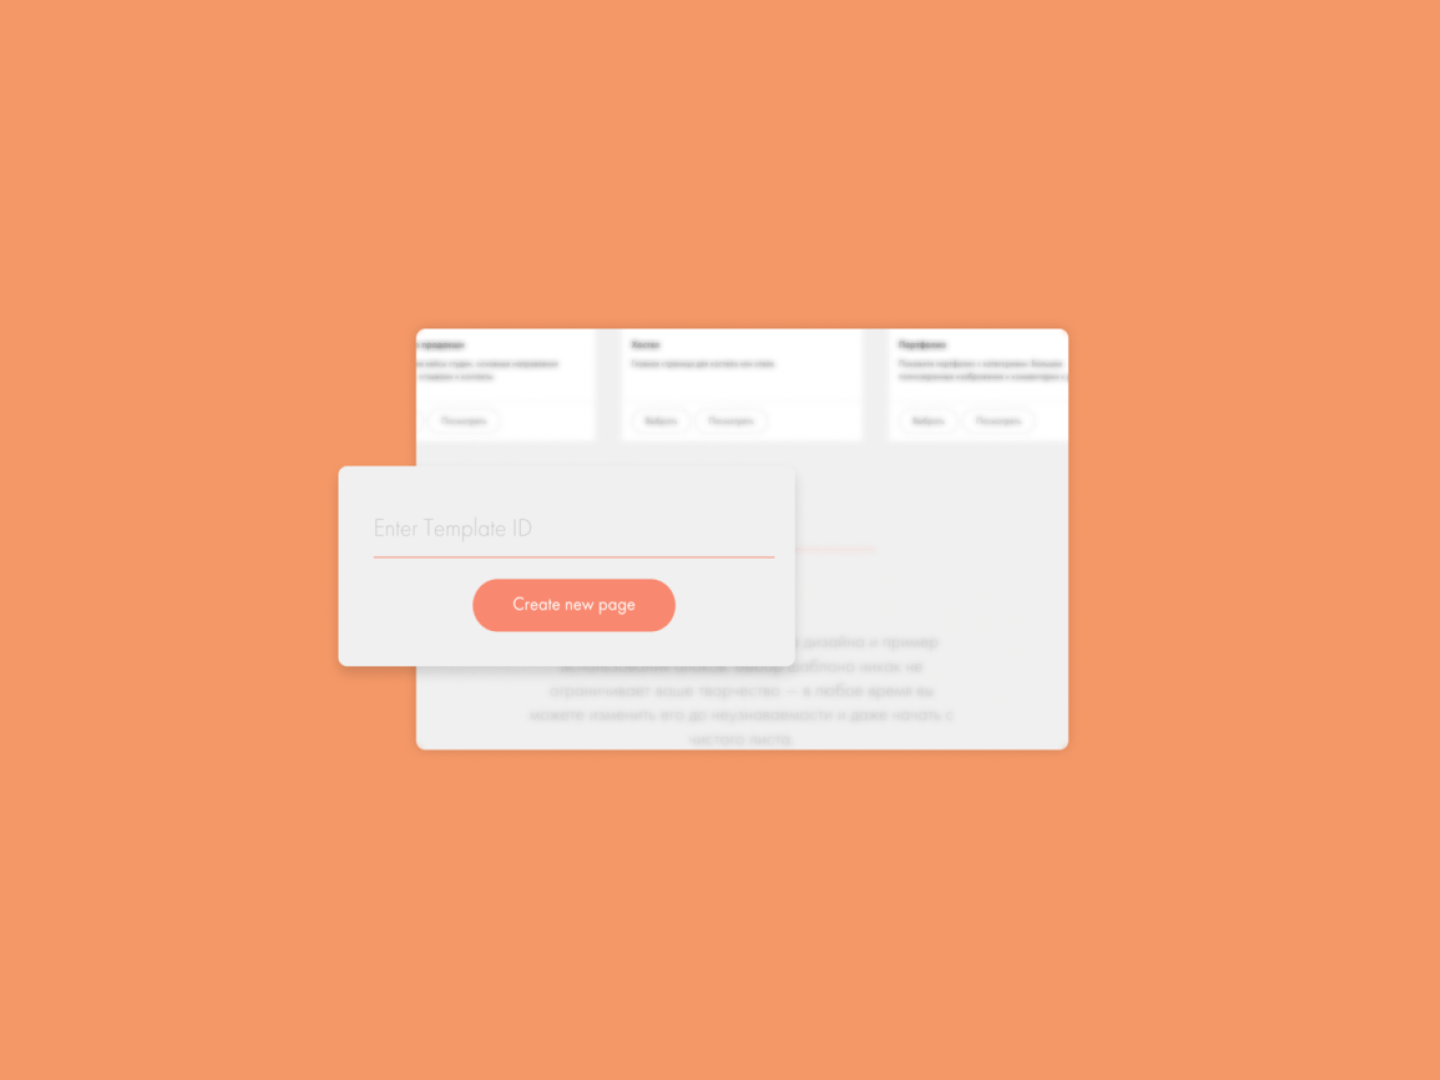
You can copy the ready template and upload it to your Tilda account, and then follow the instructions for editing the page. Click "Create new page" in your account, scroll through the gallery with templates almost to the end, to the "Enter Template ID" button. Click it and specify the TEMPLATE ID:

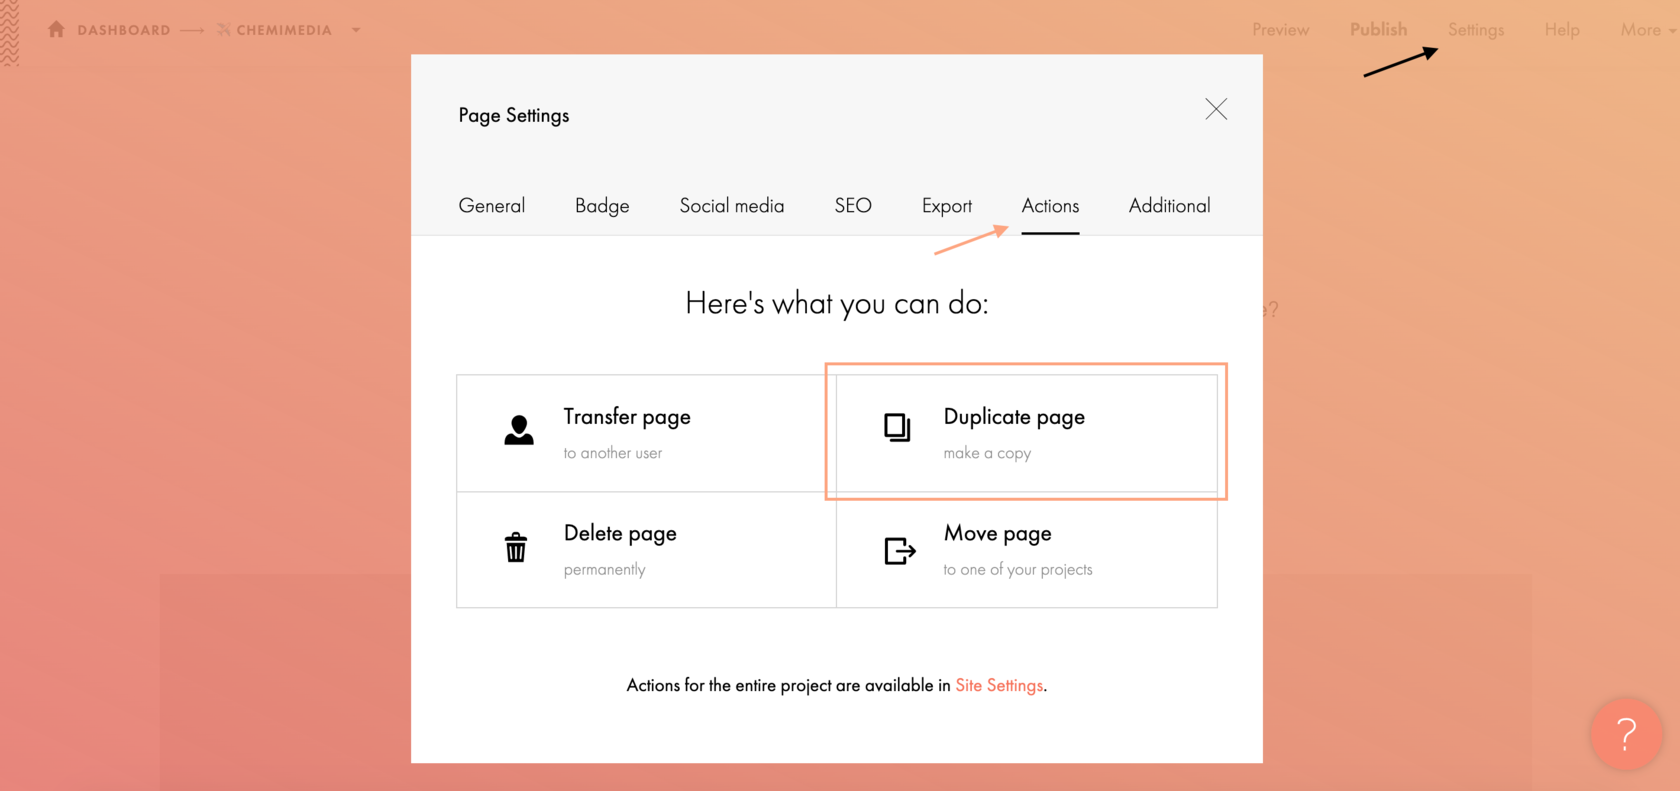
We recommend making backups so that you have two pages — with the original blocks and with the blocks that you are editing. If you make a mistake or want to go back, you can copy a certain block and start again. But in any case, you will have the opportunity to re-upload a duplicate of the block by ID).
Installing Fonts
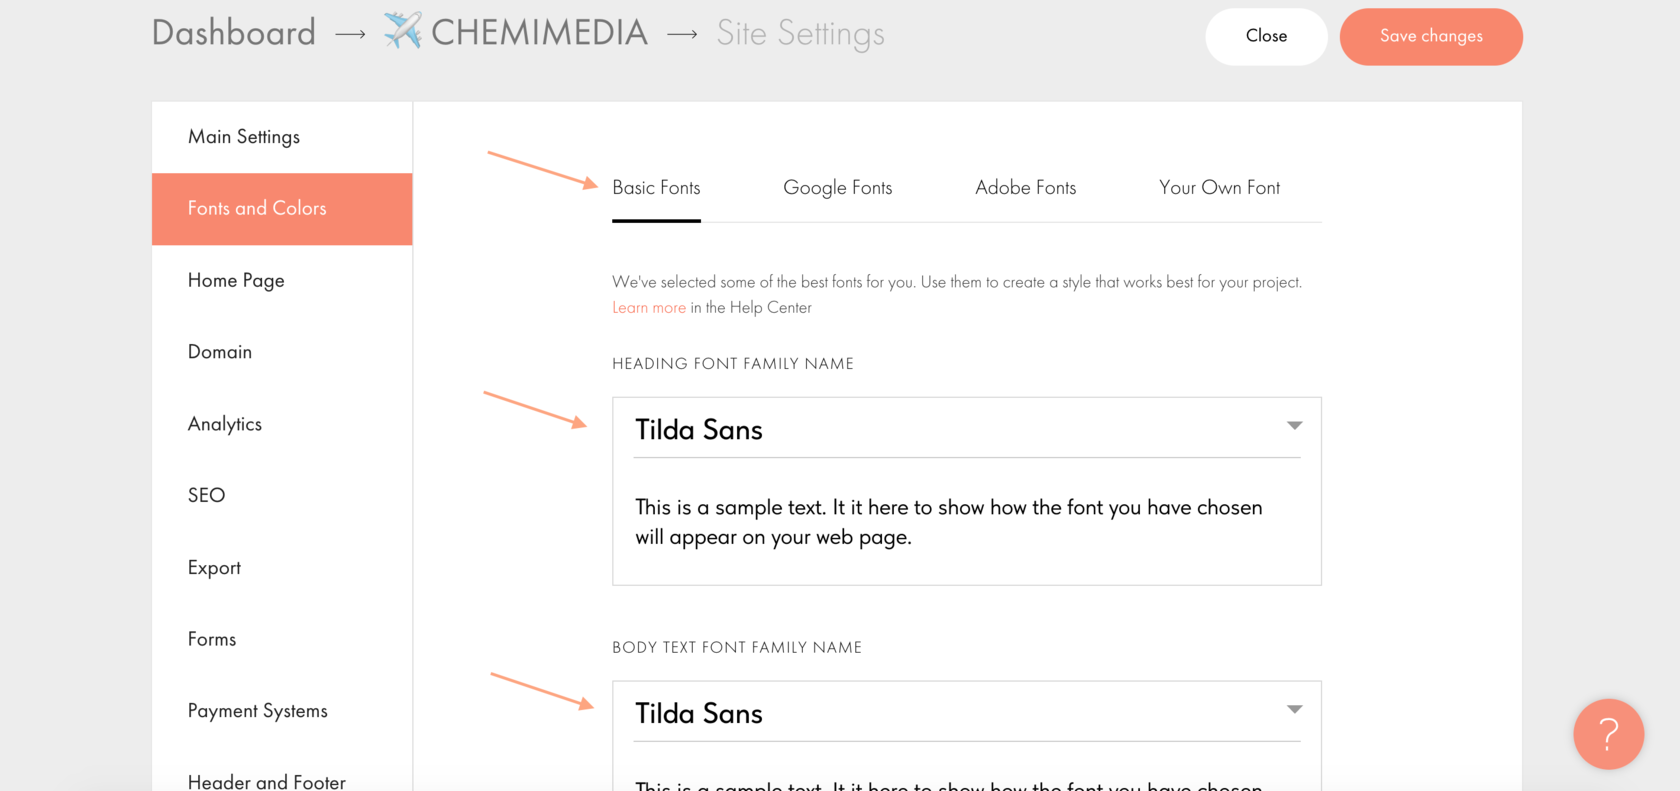
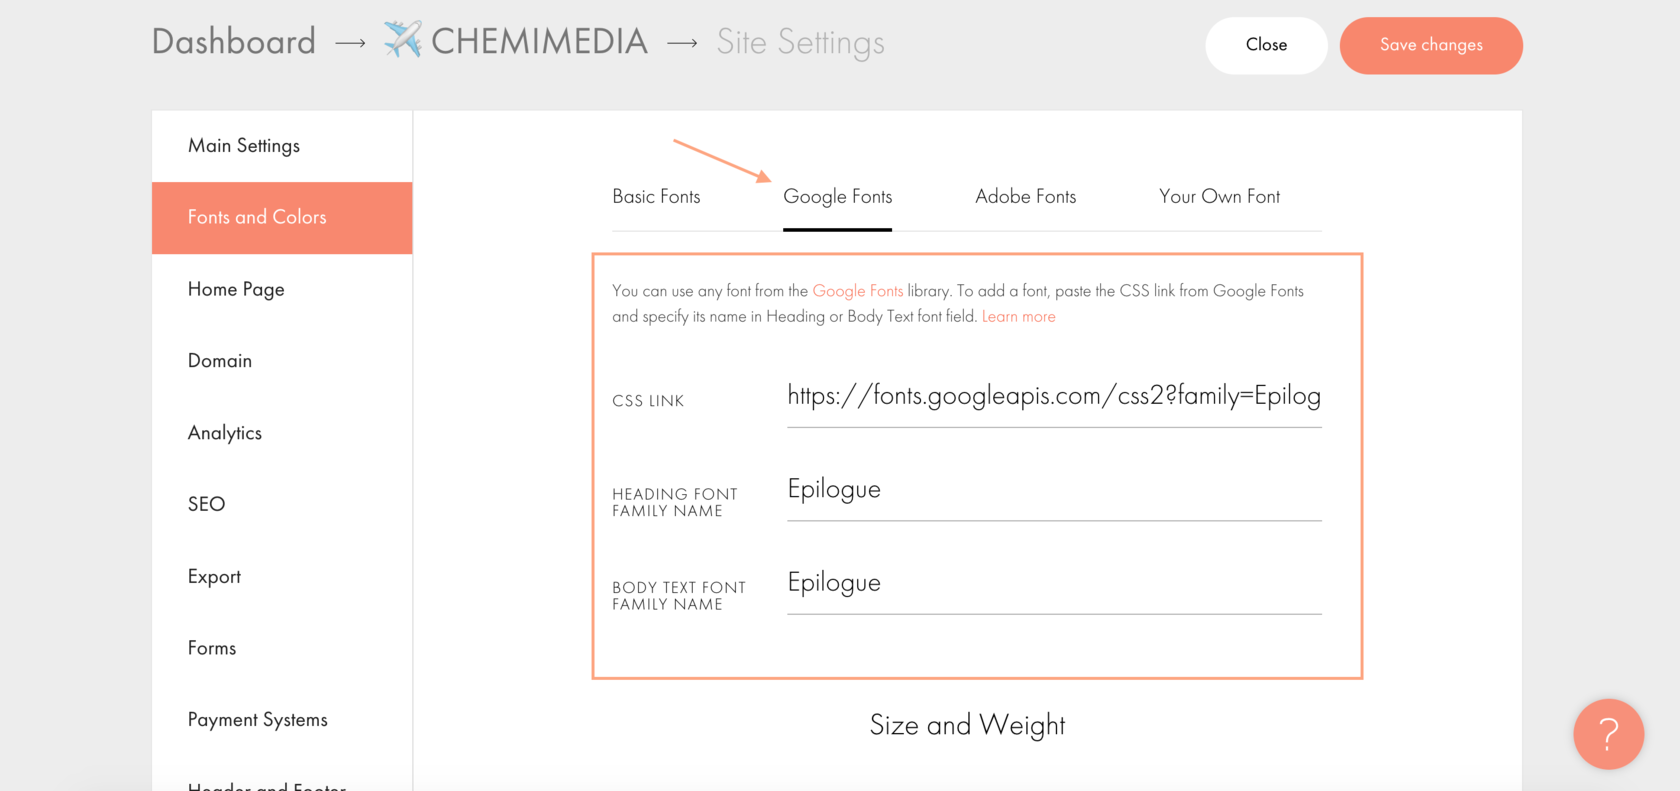
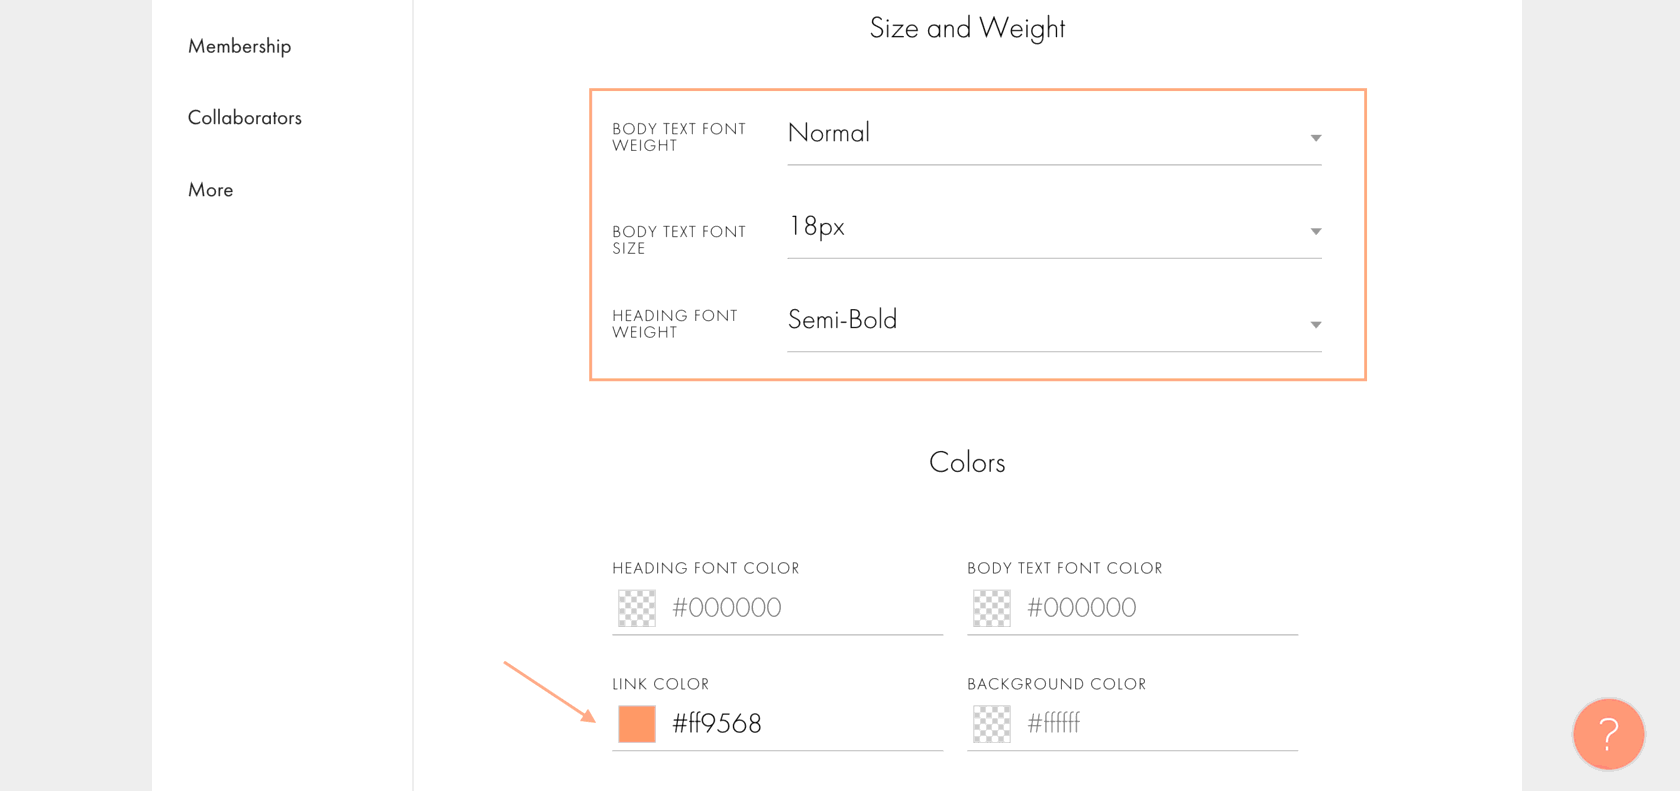
For each template, we specify which font was used in it. To display it correctly, you need to set it in the site settings. In addition, the size and saturation parameters set on the site are also important:

Learn more about setting up fonts in Tilda Help Center
You can use a different font, but when using zero blocks, you will need to check the adaptivity of all resolutions: each font has its own characteristics (thickness, height of characters, letter spacing), and when changing the design can "float". You can fix these details by editing the block.
Standard and Zero Blocks
You can edit standard blocks on Tilda by clicking on a particular element or by going to the settings panel. Click the "Content" button to access it.
Many of the blocks in the templates are Zero Blocks that allow you to make a more interesting, unique design. They are edited through the Zero Block editor, which you can get into by clicking on the "Block Editor" button in the upper left corner of each such block.
Learn more in Tilda Instruction: Zero Block
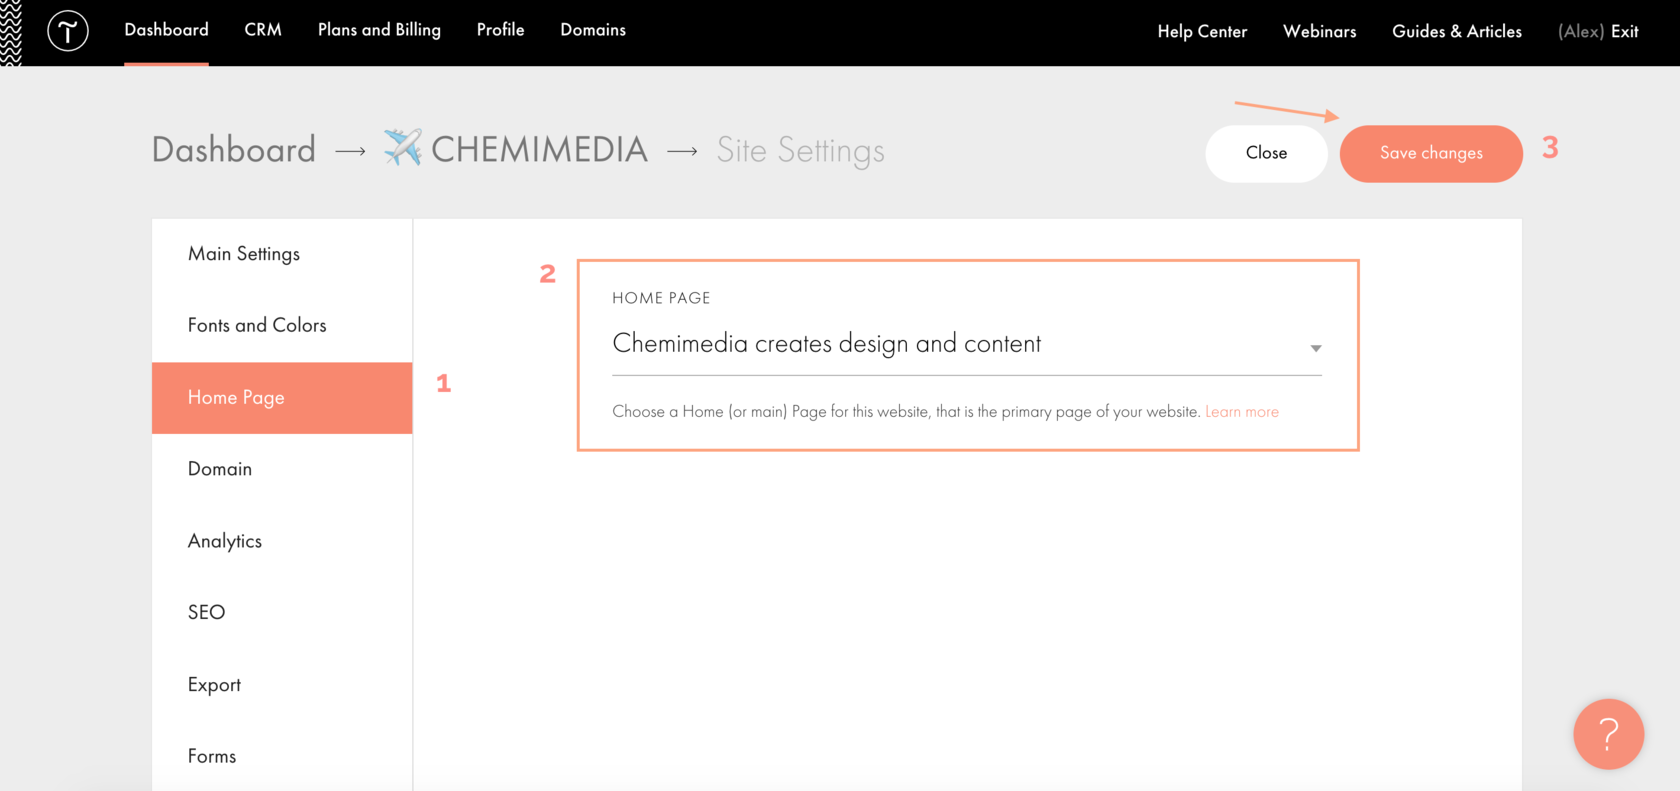
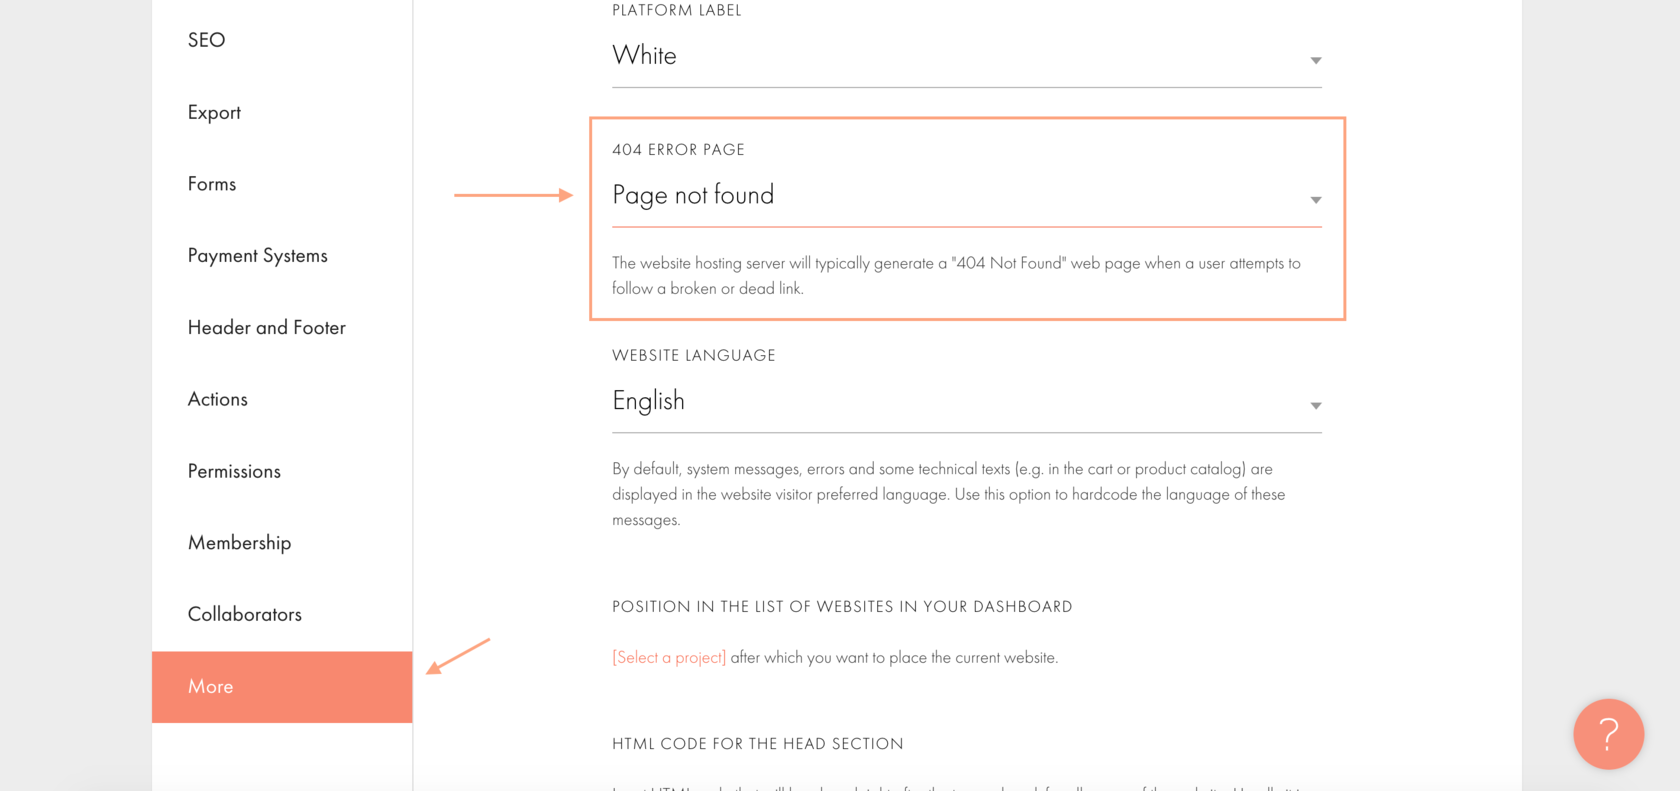
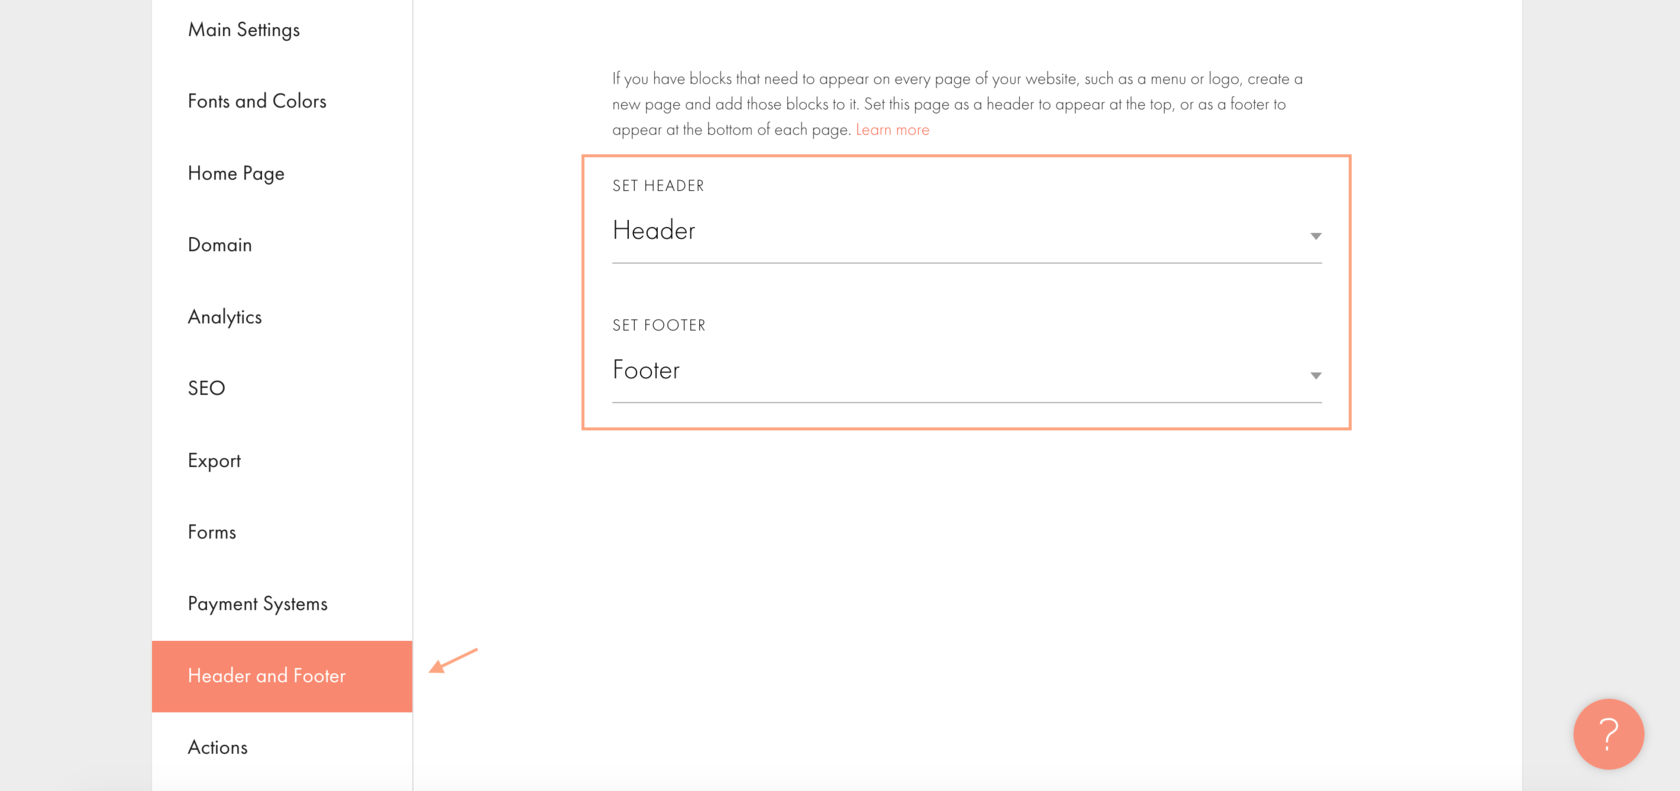
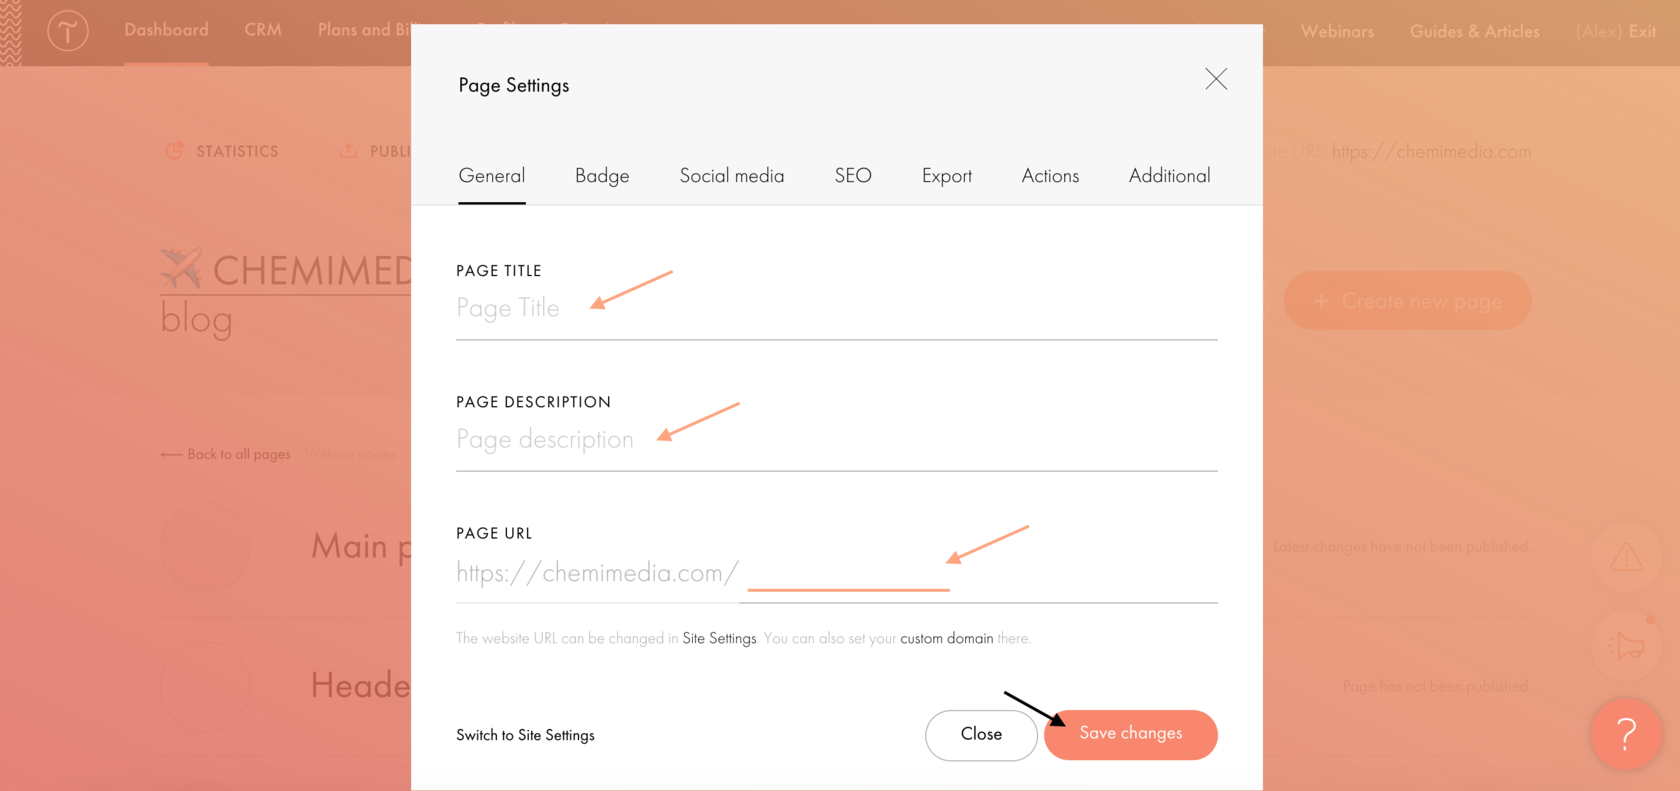
Configuring pages in Site templates
In the site templates, we specify which of the pages should be set as the main page, header (site header) and footer (site basement), Error page, Personal Data Processing Policy. To make the menu and the basement automatically load to each published page, and to make it easier to edit them, we recommend that you set the correct settings for these pages: